JoyMonster Unity Plugin Documentation v1.1.0
Updated 10/14/2019
Getting Started
JoyMonster is currently only available for games built in Unity.
This section will guide you through obtaining your API keys and configuring Unity.
Create Your Developer Account
Create your account at app.joymonster.com/signup, and fill out the basic information.
Create a Game
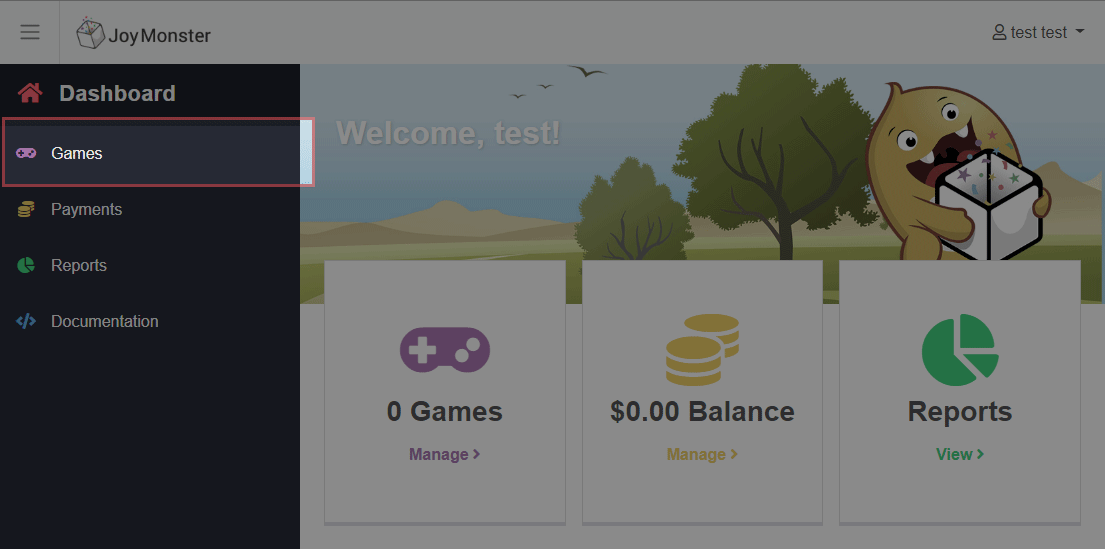
Select the "Games" menu item
Then click "New" to access the "Add Game" form
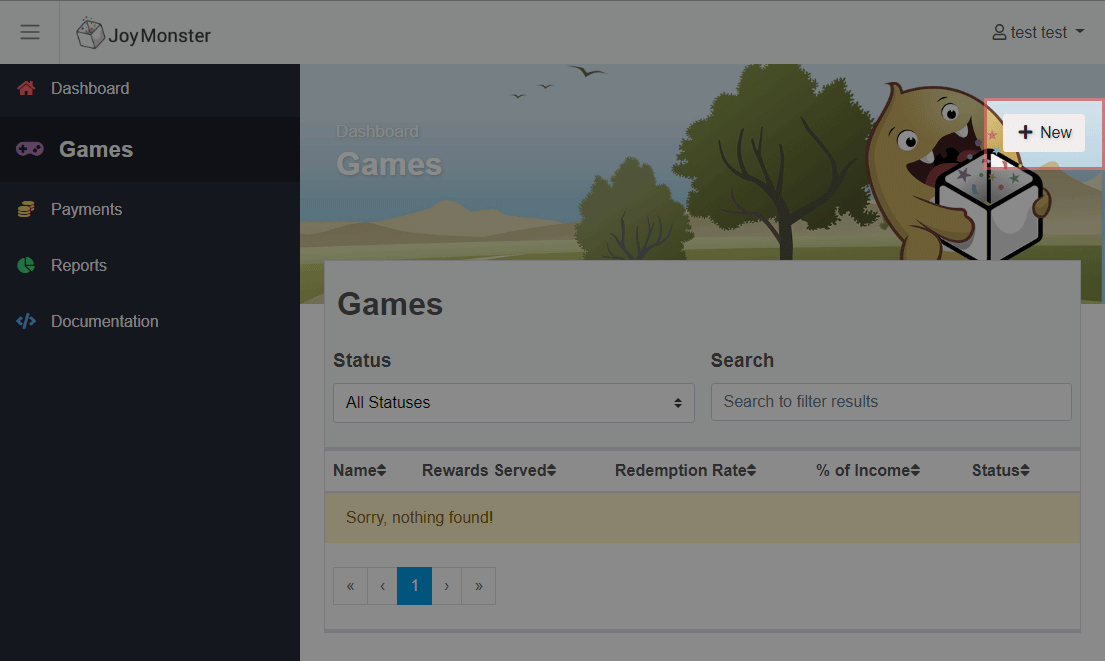
Please fill out basic information on the game. The JoyMonster team will get to work on the approval process for your game. You will immediately be given the sandbox api key so that you can begin integrating the JoyMonster box into your Unity game. Once your game has been approved, you will be granted the production API key. Please see the Sandbox section for more information on how to use it.
You may be contacted directly at the email address you used to sign up to clarify any details on the game.
Download & Install the Plugin
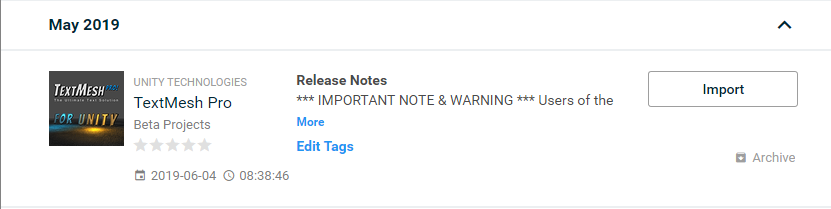
Download and install the JoyMonster plugin from the Developer dashboard. Once the download has completed, import the plugin into your project using the import button on the package in the unity store.
We recommend using the Unity store to download and install the plugin. If you are using a package that did not come through the Unity store, you may import the package by going to Assets > Import Package > Custom Package.
Demo Game Notes
We include a second Unity Package in the zip file that is a demo game with the JoyMonster code integrated as an example; TextMeshPro Essentials is a requirement that Unity will download when the scene in the demo is loaded. On first run, there may be some small bugs in the display; this is due to TextMeshPro importing TMP Essentials while the demo scene is loading. If it happens, wait till the import completes, then, without saving, re-open the scene.
Unity Version Notes
Unity versions 2019.3 or greater are not supported at this time.
Running Unity 2018.2 or older? Unity 2018.3 minimum is required to be able to request permissions to use location. It is highly recommended that you use the 2018.3 or newer. This version uses run-time permissions, which will prompt the user for their location when either the first offer is displayed or when the wallet is opened.
With any Unity version before 2018.3:
- If the device is running > Android 6: The user will have a pop-up asking for location permission at the start of the game. If this is dismissed, you will not get another chance to ask for player location permissions again. JoyMonster runs best with location turned on so we can give the users local offers.
- If the device is running < Android 6: you directly have location data. It's asked for on application install.
- If the device is running Android 6: you may need to add
unityplayer.SkipPermissionsDialogmeta-data to the Android manifest. More info in the Unity Manual under "Runtime permissions in Android 6.0 (Marshmallow)" — Unity Manual: Android Manifest .
Build System Notes
Building for Android: when building for Android, the build system must be Gradle.
Dependencies
-
The plugin requires TextMesh Pro. If you are running Unity 2018.2 or newer, you will be automatically prompted to install the package.
-
You may download and install TextMesh Pro directly from the Unity store if you are using an older version.
You may need to re-import the JoyMonster plugin after you have downloaded TextMesh Pro.
Testing The Plugin in the SandBox
Defining the API Key
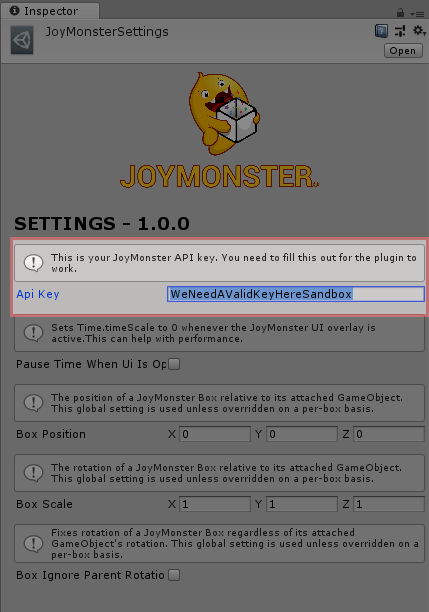
Get your Sandbox API Key, and set it inside the JoyMonster window.

For that, simply open the Window > JoyMonster > Settings window...
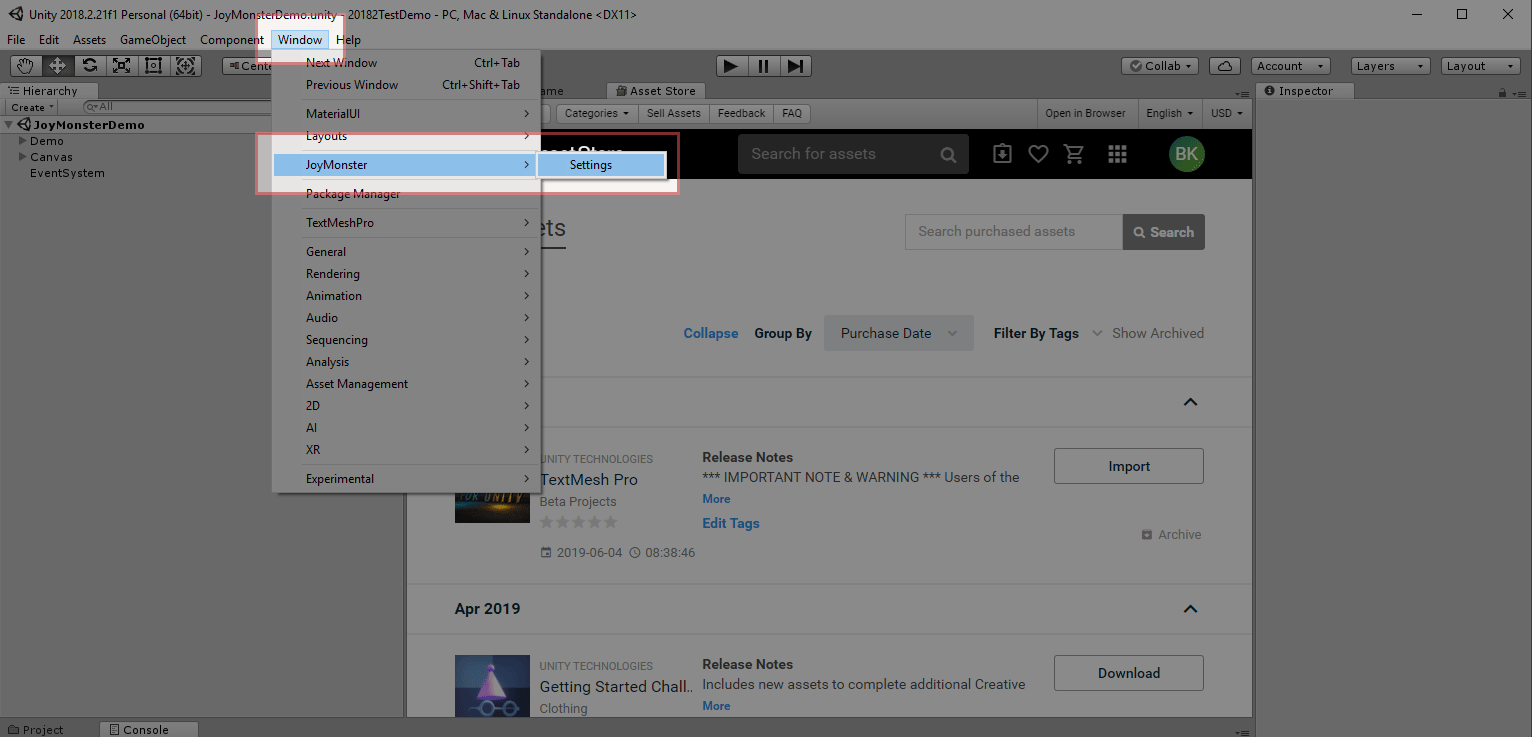
...and enter your API Key inside the Authentication section.
Launching The Plugin With Production API Key
Defining the API Key
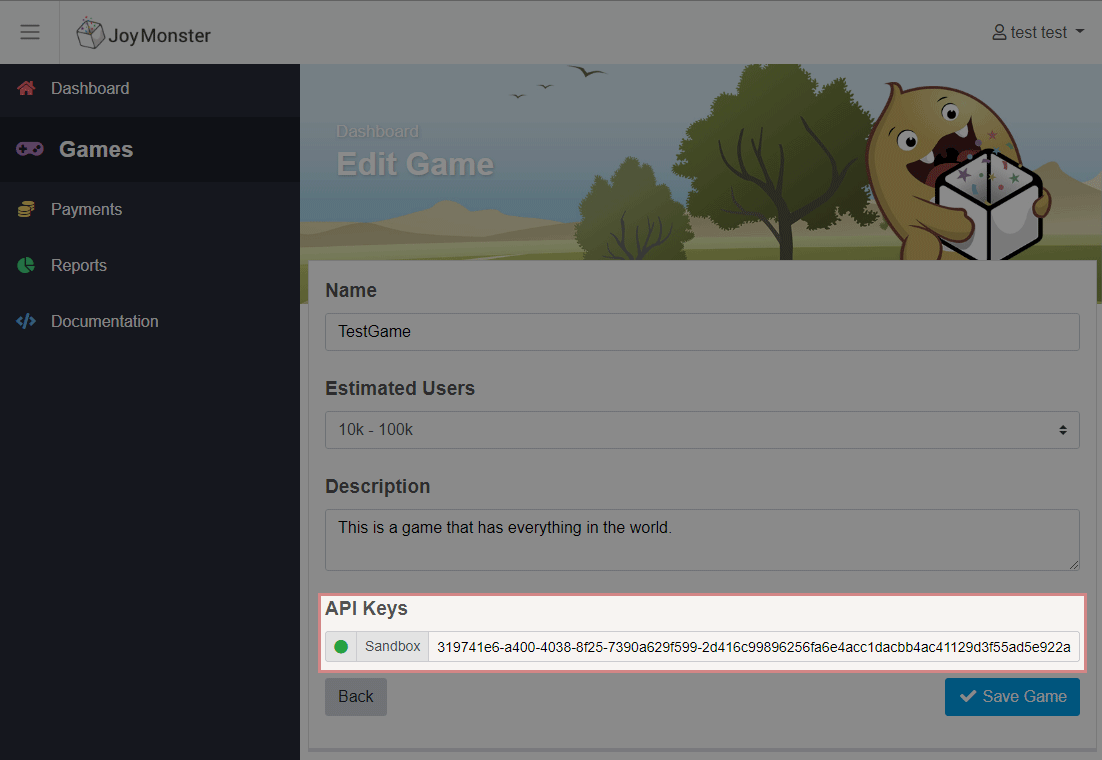
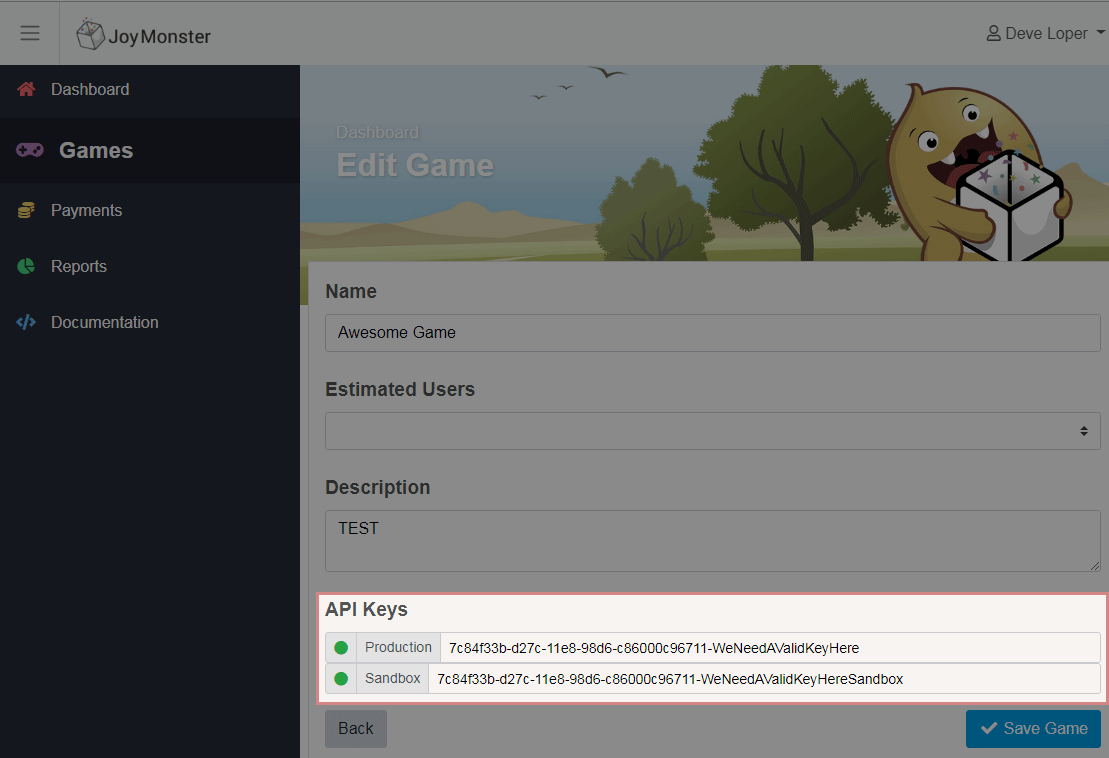
Once your game has been approved by the JoyMonster team, a production API key will be issued, and will be available on the "Edit Game" page, which you may then insert into your Unity settings.
Platform-Specific Required Settings
iOS - Requires a Location Usage Description
- Go to Edit > Project Settings > Player > [iOS Tab]
- Under the iOS tab, enter a value for the "Location usage description".
- Suggested Value: "We request your approximate location to serve you rewards from local merchants"
Don't Get Rejected By iTunes!
Apple provides an "Identifier for Advertising" (IDFA), and they are very particular about how developers use it. When you register your game with iTunes, you will be asked whether or not your app uses the IDFA. The JoyMonster plugin does not use the IDFA, so to avoid extra scrutiny, please indicate that your game does not use the IDFA, unless you are, in fact, using that identifier in some capactiy outside of JoyMonster's scope.
Integrating JoyMonster With Your Game
Summary
When you start your game, JoyMonster will automatically fetch some offers your user can win during the game, and store them in memory.
Then, in the game, you need to make our JoyMonster box  appear, whenever you want, wherever you want. This is a box the user needs to collect to earn a reward.
At the end of the game, when you show the end game screen to the user, you just call a method from our plugin that will display the list of rewards available if there's any.
To properly integrate JoyMonster into your game, you must successfully add each of these functions to your game:
- Starting the Game:
JoyMonsterPlugin.ResetBeforeGameStart(); - Display the Wallet:
JoyMonsterPlugin.ShowWallet(); - Attach the JoyMonster Box:
void OnEnable(){ this.GetComponent<JoyMonster.World.JoyMonsterBox>().AttachBox(); } - Destroy the JoyMonster Box:
this.GetComponent<JoyMonster.World.JoyMonsterBox>().CollectBox(); - Release the JoyMonster Box:
this.GetComponent<JoyMonster.World.JoyMonsterBox>().ReleaseBox(); - Show the Carousel:
JoyMonsterPlugin.ShowRewardsIfAvailable();
Please see below to learn more about each of these functions.
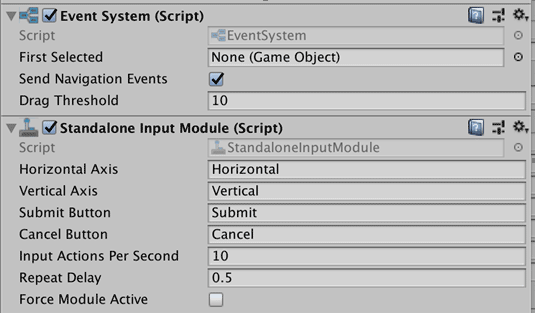
EventSystem
You will need to have an EventSystem object in the scene so input can work.
EventSystem objects are automatically created by Unity when you create something related to UI in the scene. If for some reason you only have a 3D screen and absolutely no UI objects, you'll need to create a simple gameObject with this on it:
Starting The Game
You will need to call this function at the start of the game to ensure that the plugin is correctly able to serve rewards:
JoyMonsterPlugin.ResetBeforeGameStart()Displaying The Wallet
The wallet screen
You'll need to add a button called "Wallet" somewhere in your game that users can click on to display the list of offers available to them. We recommend adding this to the game menu so that the user can easily access the wallet to redeem their rewards and it does not interfere with gameplay.
In order to display the wallet, simply call JoyMonsterPlugin.ShowWallet() when the user clicks on this button.
JoyMonsterPlugin.ShowWallet();Displaying offers available
If you want to highlight the wallet button, make it flash or anything, to alert the user that some offers are available in the wallet, you can use the JoyMonsterPlugin.GetOfferCount() method as follows:
JoyMonsterPlugin.GetOfferCount(){
    // The user has offers! Do what you want here with that information
}).Catch(exception => {
    // An error occurred checking if the wallet has offers
    // You can use exception.Message to see what the error is
});
A real-world example, taken from our demo game's "Update the Wallet" button:
private void UpdateWalletButton()
{
    JoyMonsterPlugin.GetOfferCount()
    .Then(offerCount =>
    {
        M_WalletButton.GetComponentInChildren().text = "Open Wallet" + (offerCount > 0 ? " (Offers Available)" : " (No Offers)");
    }).Catch(exception =>
    {
        Debug.LogError("An error occurred checking if the wallet has offers: " + exception.Message);
    });
}
The JoyMonster Box
Attaching the Box
JoyMonsterBox script to every type of object in the scene where you will want to display a JoyMonster Box. Then, simply call AttachBox whenever you want a box to appear. The basic solution is to call it whenever the object is created (OnEnable), so a box is on the object as soon as that object is available. However, in most cases, developers will probably have their own logic to determine when and where JoyMonster Boxes are attached, in which case, AttachBox would be called somewhere other than OnEnable.
You have to decide where you want the JoyMonster box to appear in your game (maybe on an enemy, maybe somewhere on the road for a driving game, maybe as a small bonus object appearing randomly in the sky, etc.).
Then you need an object in the scene to which we can attach the box.
Let's take the example of an enemy:
- You just need to attach the
JoyMonsterBoxscript to your enemy prefab, so every enemy in the scene will have theJoyMonsterBoxscript attached to it (it does absolutely nothing for now, so there's no need to worry about performance). Then, whenever you want to display a box on the enemy, you just need to callGetComponent<JoyMonsterBox>().AttachBox()on your enemy object to make the box appear. You can decide to do that directly when your object is created (in the Start method, for example), or whenever the enemy appears on screen, or any logic you want. - If you don't want to add the
JoyMonsterBoxscript to every object in the scene, you just need to define your own logic as to when you want to display the box. You can have a small script that waits for n enemies to appear, then takes the n+1 enemy, callsAddComponent<JoyMonsterBox>on it, and then callsAttachBox. It's really up to you.
The JoyMonster Box is called from the JoyMonster.World method. You may want to include this as a using statement at
the top of your script. The examples below include the full call.
In order to attach a JoyMonster box to an object of your choice in your game, you'll just have to attach the
JoyMonsterBox component at the root of this object. And inside your own script (attached to the object),
you'll just have to call the AttachBox method of the JoyMonsterBox component, as such:
void OnEnable(){
    this.GetComponent<JoyMonster.World.JoyMonsterBox>().AttachBox();
}
This will automatically attach the JoyMonsterBox on top of your object in the game, if one is available. If none are
available, nothing will happen, so you don't have to worry about anything.
You can call AttachBox anytime you want without having to worry if a box is already on screen or not, because it will be detected by the plugin, which will allow only one box to display at a time.
As each game is a bit different, this is also the place where you can define your own rules, such as only calling AttachBox once in a game, or once every x minutes, etc…
When JoyMonster is initialized by the user, the plugin will ask the server if there are any rewards available to that user. The plugin will either return the number of engagements in the area or not.
If there is an engagement available, then JoyMonster will attach the box to the object. If the player is throttled,then the box will not attach to the object.
Box Position & Scale
There are position and scale parameters associated with the box that you can either assign globally or change on the objects themselves.
Collecting the Box
Once the player collected/destroyed/touched your object and it is now "collected", you'll also need to trigger
the "collection" of the JoyMonsterBox. In order to do that, simply call the CollectBox method on the JoyMonsterBox component, as such:
this.GetComponent<JoyMonster.World.JoyMonsterBox>().CollectBox();This will trigger the animation of the JoyMonsterBox being destroyed, store the collected rewards, and display a carousel from which the user may choose a single reward to add to their wallet.
Releasing the box
In some cases, the player will miss your object, and thus will not collect the JoyMonsterBox.
Whenever you want the box to appear somewhere else in the scene, you can call the ReleaseBox function.
For example, when the box on screen leaves the screen, you want to "release" the JoyMonsterBox so you'll be able to reuse it later in the game, when another call to AttachBox will be made. In order to do that, just call the ReleaseBox method on the JoyMonsterBox component.
In most cases, you already destroy your object when it's out of screen, if that's the case, just add the ReleaseBox call inside the OnDestroy callback of your script, so when your object is destroyed, it will also release the JoyMonsterBox.
void OnDestroy(){
    this.GetComponent<JoyMonster.World.JoyMonsterBox>().ReleaseBox();
}
End of the Game
When the game is finished, or when it's game over, you want to call ShowRewardsIfAvailable to display the carousel with offers that the user can select if a box has been collected during the game:
JoyMonsterPlugin.ShowRewardsIfAvailable();Calling this method will display a list of rewards available in fullscreen. The user will dismiss the screen and will be brought back to your game over screen.
Handling Unsupported Countries
JoyMonster offers are not available in some countries. To allow you to hide the JoyMonster Wallet button when an unsupported country is detected, we have exposed the JoyMonsterPlugin.unsupportedCountry property.
Example: Hiding A Button For Unsupported Countries
This is the code from our demo game that hides the Wallet button for unsupported countries.
using System.Collections;
using UnityEngine;
using UnityEngine.UI;

namespace JoyMonster.Demo
{
    public class WalletButton : MonoBehaviour
    {
        public Button button;
        public bool disableWhenUnsupported;
        public bool hideWhenUnsupported;

        private void Start()
        {
            StartCoroutine("SetButtonState");
        }

        private IEnumerator SetButtonState()
        {
            while(!JoyMonsterPlugin.countrySupportDetermined)
            {
                yield return null;
            }
            if(JoyMonsterPlugin.unsupportedCountry)
            {
                if(disableWhenUnsupported)
                {
                    button.interactable = false;
                }
                else if(hideWhenUnsupported)
                {
                    button.gameObject.SetActive(false);
                }
            }
        }
    }
}
Sandbox Behavior
The sandbox allows you to call real-world offers. Please be sure that you have location enabled. You will not be able to add the offer to your wallet. You will be able to see a sandbox offer in your wallet when you call the ShowWallet(); function.
Due to the way the plugin serves offers, your device might be on a cooldown timer when you switch to a production API key. The cooldown timer prevents abuse, and it will eventually reset. Users will typically receive multiple offers in the first hour, and the minute interval will increase until 24 hours have passed.
Logging & Debugging
These options will provide some information about the API calls (success/failure and some other info for engagement/wallet requests).
Enable Logging
Top Menu > Window > JoyMonster > Settings
- See the option to enable logging for JoyMonster-related functions.
Enable Debugging
Player Settings > Project Settings > Other Settings
- See options to enable 'Development Build' and 'Script Debugging'
- Optionally, toggle the logging/stack trace options to 'Full'
Upgrading the Plugin
The simplest approach to upgrading is to:
- Save the settings in the JoyMonster Settings window somewhere so you can replicate them after upgrading.
- Completely remove the JoyMonster and the JoyMonster Demo folders from your project.
- Import the new Unity packages and restore the settings you had saved for reference.